

Key Takeaways
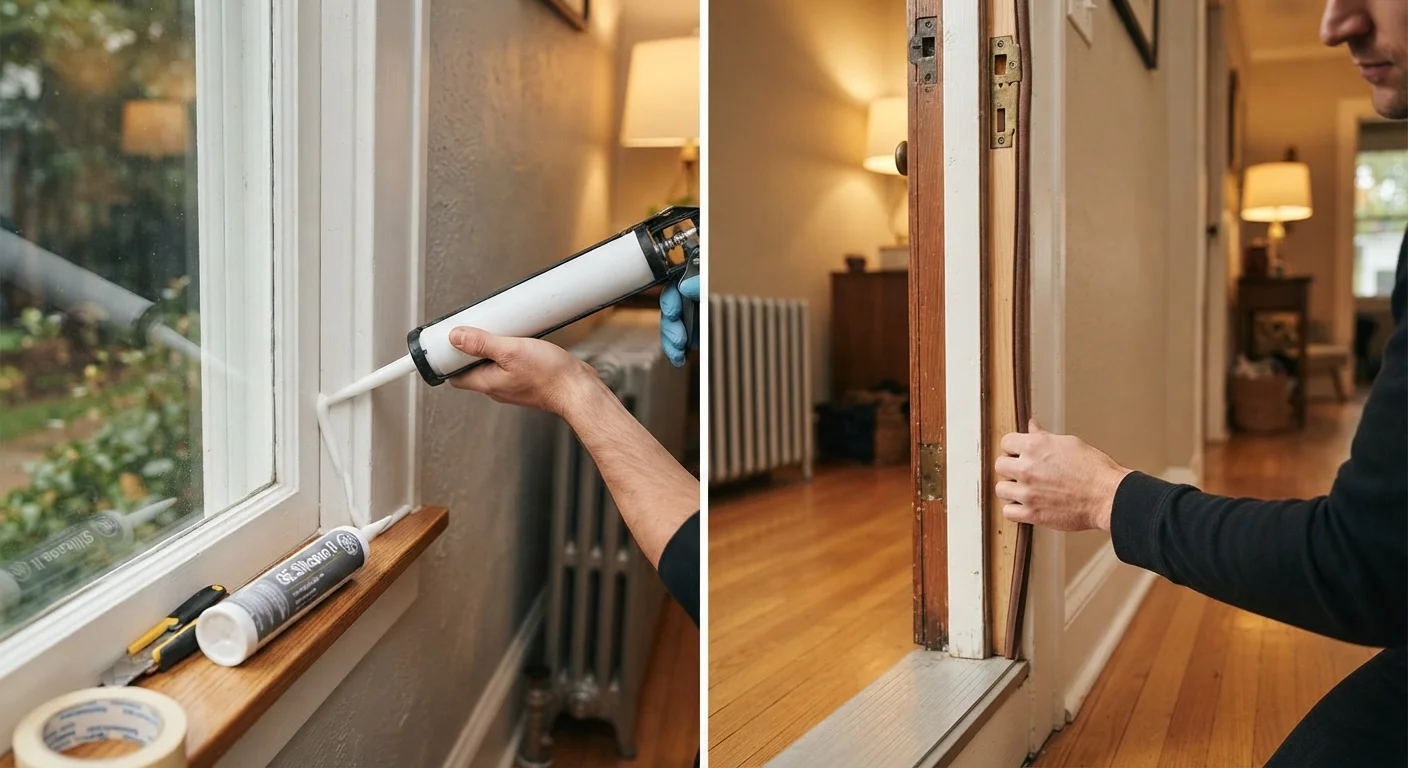
- Caulk is for stationary gaps; weatherstripping is for gaps around moving parts like doors and operable windows.
- Using the wrong material in the wrong spot leads to premature failure and wasted effort.
- Most homes need both products — they complement rather than replace each other.
- Weatherstripping wears out faster and should be inspected annually, especially before winter.
- Silicone caulk works best outdoors; latex or acrylic caulk suits most interior applications.
Option A
Caulking
The permanent, flexible filler for stationary gaps.
Best for: Sealing fixed cracks and joints along windows, baseboards, and exterior siding where surfaces don't move.
Option B
Weatherstripping
The compressible seal for moving parts.
Best for: Creating an airtight barrier around doors and operable windows that open and close regularly.
If you're sealing a fixed crack between your window frame and siding
Caulking
Stationary joints need a bonded, flexible sealant that cures in place. Weatherstripping won't adhere correctly and will quickly fail in this application.
If you're stopping drafts around an exterior door that opens daily
Weatherstripping
Doors compress and release a seal every time they open. Caulk would crack almost immediately under that repeated movement.
If you're addressing both a drafty door and a cracked sill below it
Both
Apply weatherstripping to the door frame and caulk along the fixed sill joint. These two products are designed to work together.
If you're tackling a bathroom or kitchen area prone to moisture
Caulking
Silicone or siliconized latex caulk creates a waterproof, mold-resistant seal that weatherstripping cannot provide in wet environments.
Why the Distinction Matters
Walk into any hardware store and you'll find an entire aisle dedicated to gap-sealing products. Caulk tubes and weatherstripping rolls sit near each other, solve similar problems on the surface, and cost about the same — which is exactly why homeowners frequently reach for the wrong one.
The core difference is movement. Caulk is a sealant that cures into a semi-flexible solid, permanently bonding two stationary surfaces together. Weatherstripping, by contrast, is a compressible material — foam, rubber, vinyl, or felt — designed to be compressed and released repeatedly without breaking down.
Choosing the wrong product doesn't just fail to fix the problem; it can make the job harder to redo later. Caulk applied around a door stop will crack within weeks from the repeated door movement, leaving a sticky, difficult-to-remove residue. Weatherstripping pressed into a fixed wall crack won't bond and will simply fall out. As our editorial guide on what caulk, grout, and weatherstripping actually do explains, each material has a distinct job — and each fails in predictable ways when misapplied.
| Criterion | Caulking | Weatherstripping |
|---|---|---|
| Best for | Fixed, stationary gaps and joints | Moving parts (doors, operable windows) |
| How it seals | Cures into a bonded, semi-flexible solid | Compresses and rebounds with movement |
| Common materials | Silicone, latex, siliconized latex | Foam tape, V-strip, rubber bulb, door sweep |
| Typical lifespan | 5–20 years depending on type and location | 1–10 years depending on material and use |
| Paintable | Latex types yes; silicone generally no | Usually no |
| Water resistance | High (especially silicone) | Moderate; not suited for wet areas |
| DIY difficulty | Low to moderate; requires surface prep | Low; most types peel-and-stick or screw-on |
Where Caulk Belongs — and Which Type to Use
Caulk is the right tool wherever two fixed surfaces meet and leave a gap. Common applications include:
- The joint between a window frame and interior drywall or exterior siding
- Along baseboards where they meet the floor or wall
- Around pipe penetrations through walls or floors
- Bathtub and shower surrounds where tile meets a tub deck
- Exterior gaps in wood siding or around vent covers
For exterior or wet-area use, silicone caulk holds up best against temperature swings and moisture. It's harder to tool and can't be painted, but it lasts significantly longer outdoors than acrylic options. Latex or acrylic latex caulk is easier to work with indoors, paintable, and cleans up with water — it's the workhorse for interior trim and drywall gaps. Siliconized latex blends both properties and works well in kitchens and bathrooms.
~30%
Home heating/cooling lost through gaps and cracks
The U.S. Department of Energy estimates that air leaks can account for roughly 25–30% of heating and cooling energy use in a typical home.
$200–$600
Estimated annual savings from sealing air leaks
The EPA's ENERGY STAR program suggests that properly air-sealing and insulating can save homeowners a significant portion of their annual energy bills, though results vary by climate and home size.
Before applying any caulk, remove all old, cracked material with a putty knife or oscillating tool, clean the surface thoroughly, and allow it to dry completely. Most caulks need 24 hours to cure before exposure to moisture.
Where Weatherstripping Belongs — and How to Pick the Right Type
Weatherstripping is the correct choice anywhere a gap is created and closed repeatedly. Think of it this way: if the seal needs to survive a door slamming 1,000 times, it must be compressible, not rigid.
Common placements include:
- The top and sides of exterior door frames (door stops)
- The bottom of exterior doors (using a door sweep or threshold seal)
- Around operable casement or double-hung windows
- Attic hatches and pull-down stair openings
Weatherstripping comes in several forms suited to different gaps and budgets:
- Foam tape (closed-cell)
- Easiest to install; works on irregular gaps but compresses flat over time. Best for infrequently used doors or windows.
- V-strip (tension seal)
- A durable folded plastic or metal strip that springs open to fill the gap. Works well along door sides and sliding window channels.
- Door sweeps
- Mounted to the bottom of a door, these block the gap between door and threshold. Metal-backed versions with rubber or brush inserts are more durable than adhesive-only foam strips.
- Compression bulb or tubular rubber
- Long-lasting, handles repeated compression well. Ideal for door stops on frequently used exterior doors.
Don't Caulk a Door Stop Shut
A common DIY mistake is running a bead of caulk along the door stop molding — the thin strip of wood the door closes against — thinking it will stop drafts. This prevents the door from closing properly and bonds a surface that needs to flex. Always use compressible weatherstripping on door stops, and reserve caulk for the fixed joint between the door frame and the wall.
Inspect weatherstripping annually — ideally in early fall before heating season begins. Foam strips may need replacement every one to three years; quality rubber or vinyl can last five to ten years with normal use.
How to Decide: A Simple Field Test
When you're standing in front of a gap and aren't sure which material to use, ask yourself one question: Does anything move across or through this gap regularly?
If the answer is yes — a door swings, a window slides, a hatch lifts — reach for weatherstripping. If the gap is between two surfaces that never move relative to each other, caulk is your material.
In practice, most exterior doors need both: weatherstripping along the door stop where the door face meets the frame, and caulk along the fixed joint between the door frame and the surrounding siding or interior drywall. The two products work together, not against each other, and addressing only one side of the equation still leaves energy loss on the table.
A flashlight check on a bright day (or a stick of incense moved slowly around the frame on a windy day) will help you identify where air is actually moving. Seal those spots with the appropriate material, and you'll notice the results in both comfort and energy costs — without guessing.