

Key Takeaways
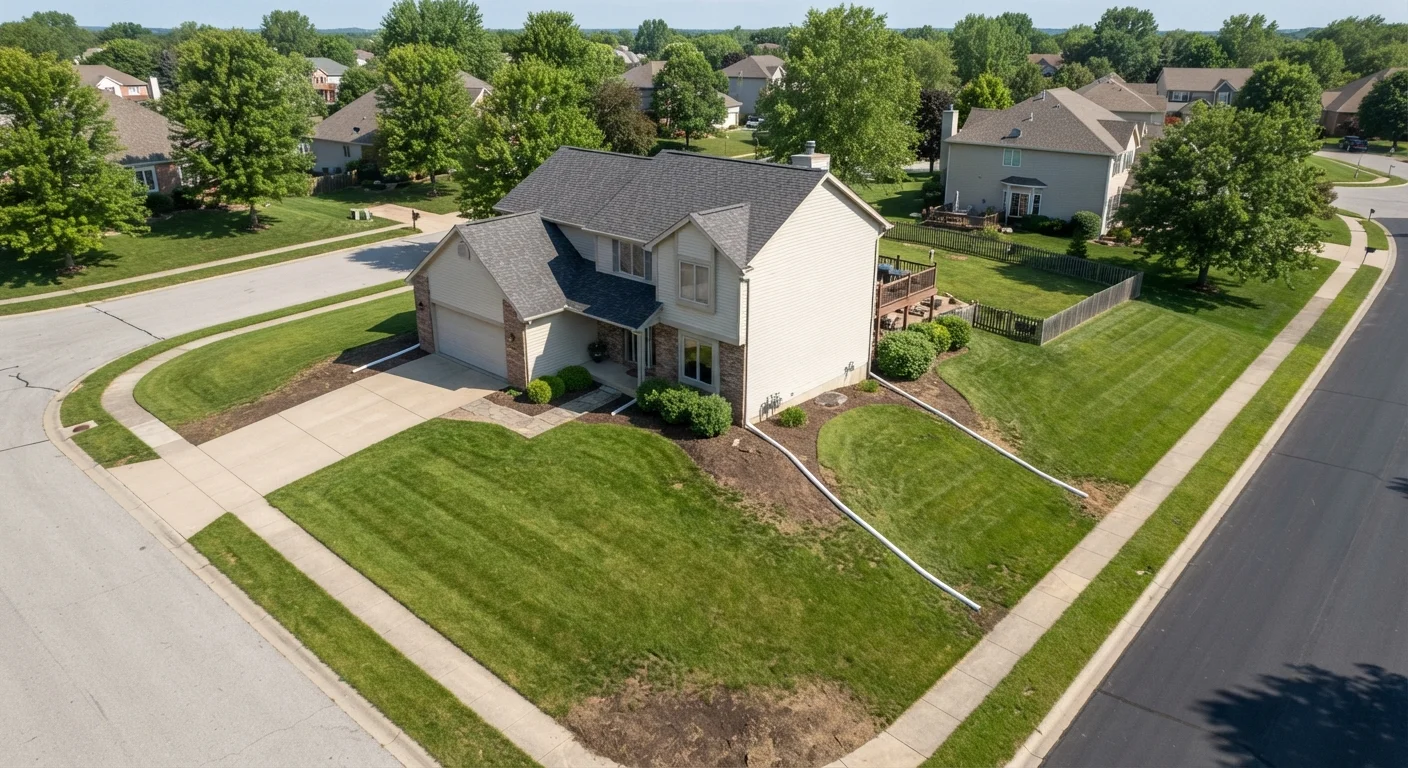
- The ground around your foundation should slope away at least 6 inches over the first 10 feet.
- Downspout extensions should discharge water at least 4–6 feet from the foundation wall.
- Clay-heavy soils hold water longer and pose greater foundation risk than sandy or amended soils.
- Pooling water near a foundation can cause cracks, basement seepage, and long-term structural damage.
- Most grading and drainage corrections are manageable DIY projects requiring basic tools and fill soil.
What you will need
Why Water at the Foundation Is a Serious Problem
Water is the most common cause of foundation damage in American homes, and the majority of infiltration problems trace back to poor surface drainage rather than structural failures or waterproofing breakdowns. When soil around the foundation stays saturated, it exerts hydrostatic pressure — the lateral force of water-logged earth pushing against the wall. Over time, this pressure causes cracks, bowing, and seepage that are expensive to repair.
Compounding the problem is the seasonal freeze-thaw cycle common across much of the US. Water that saturates soil near the foundation in fall can freeze and expand in winter, creating further stress on concrete and masonry. Preventing that saturation from occurring in the first place is far less costly than repairing the damage it causes.
Soil Type Changes Your Drainage Equation
Clay-heavy soils absorb water slowly and can hold saturation against a foundation wall for days after rain stops. If your native soil is predominantly clay, grading alone may not move water away fast enough. Amending the top layer with organic material can help, but for severe clay conditions you may need to consult a landscaping professional about more comprehensive drainage solutions. See our guide to understanding soil types for background on how soil composition affects water movement.
The good news is that most drainage problems are preventable and correctable without major excavation. The three primary controls — grade (slope of the ground), soil type, and downspout placement — are all within reach of a motivated homeowner with basic tools.
What You'll Need Before You Start
What you will need
Straight board and level
Used to measure the slope of the ground away from the foundation to verify adequate grade.
Garden rake and flat shovel
Needed to move and shape fill soil when regrading the soil around the foundation perimeter.
Hand tamper or plate compactor
Compacts newly added soil so it doesn't settle unevenly or create low spots over time.
Downspout extensions or flex drain pipe
Directs roof runoff away from the foundation to a safe discharge point in the yard.
Drain snake or garden hose
Used to flush and check for blockages in underground or buried drainage lines.
Before beginning any digging or grading, call 811 — the national call-before-you-dig service — to have underground utilities located and marked. This is free, required by law in most states, and protects you from severing electrical, gas, or water lines.
Step-by-Step: Grading, Drainage, and Downspout Corrections
Walk the perimeter and identify problem areas
After a moderate rain, walk the full perimeter of your home and note where water pools, where the soil is consistently soggy, and where the ground appears to slope toward the foundation rather than away from it. Take photos. These observations will guide where you need to regrade, extend downspouts, or add drainage infrastructure.
Check your existing slope with a board and level
Lay a long, straight board (at least 10 feet) on the ground alongside your foundation, with one end touching the foundation wall. Place a level on top. The ground should drop at least 6 inches over the first 10 feet — this is the widely recommended minimum grade for adequate drainage. If the slope is flat or negative (running toward the house), regrading is needed.
Add and shape fill soil to create a positive slope
Use a clean fill soil — ideally a clay-loam mix that compacts well and resists erosion — to build up low areas. Begin at the foundation wall and taper outward, matching the 6-inch-over-10-feet slope. Rake the soil smooth, then compact it in layers using a hand tamper. Avoid piling soil against wood siding or window wells, as this creates rot and pest entry points.
Keep the fill soil at least 4–6 inches below any wood framing, siding, or structural material where it meets the foundation.
Inspect and extend your downspouts
Downspouts that terminate at the foundation wall — even with a short splash block — frequently deposit water too close to the house. Add rigid or flexible downspout extensions to carry water at least 4–6 feet from the wall, discharging onto a gently sloped area of the yard. Make sure the extension's outlet is not aimed at a neighbor's property or a low-lying area that has nowhere for the water to go.
Our guide to gutter maintenance covers how to keep gutters clear so downspouts receive clean, unimpeded flow.
Consider a French drain for chronic low spots
If one area consistently collects water despite proper grading, a French drain can intercept and redirect subsurface water. A French drain consists of a sloped trench filled with gravel and a perforated pipe wrapped in filter fabric, which channels water toward a daylight outlet or dry well. Trenching depth typically ranges from 12 to 24 inches. This is a more involved project; verify there are no buried utilities before digging by calling 811 (the national dig-safe line in the US).
Retest with water after all corrections are made
Use a garden hose to simulate rainfall on the areas you've corrected. Watch how water moves for several minutes. It should sheet away from the foundation quickly and not pond within 6–10 feet of the wall. If new low spots appear or water still hesitates near the foundation, add additional fill and compact again before finishing.
Pair Grading Work with Downspout Improvements
Grading and downspout management work best as a system. Even perfectly graded soil can be overwhelmed if a single downspout is dumping hundreds of gallons of roof runoff in one concentrated spot during a heavy storm. Address both at the same time for the most durable results.
When to Call a Professional
DIY drainage improvements are appropriate for most surface-level water management issues. However, some situations call for professional involvement. If your property has a high water table, if basement walls show structural movement, or if surface corrections haven't resolved persistent seepage after a full season, consult a licensed waterproofing contractor or civil engineer.
Don't Ignore Signs of Existing Water Intrusion
If you already have efflorescence (white mineral deposits), cracks, or moisture staining on basement or crawl space walls, surface grading corrections alone may not be sufficient. These signs can indicate hydrostatic pressure or compromised waterproofing that requires professional evaluation. A licensed waterproofing contractor or structural engineer should assess any foundation that shows active seepage or cracking before you invest in surface-level drainage work.
Similarly, if your downspout corrections require connecting to municipal storm drains or crossing property lines, check with your local municipality before proceeding — permits or easement considerations may apply.
Maintaining clear, functioning gutters is a related priority. If you haven't evaluated your gutter system recently, our guide to gutter care walks through what routine maintenance involves and what signs of failure look like. Healthy gutters feed healthy drainage — the two systems are inseparable.